In today’s world of constructive architectural designs, bathrooms are not just considered as a place for freshening up but are much more than that. Bathrooms are now a favorite spot for all of us as we consider this as a personal space for getting refreshed. Nowadays, people are spending a substantial amount of time as well as investing a lot of money on building bathrooms as per their choice.
After so much investment of time and money, one will get disturbed when such a bathroom gets in affected due to water leakage from the walls, floors or joints making them damp. Hence, if you have not waterproofed the bathroom or if it has been done very poorly, it will create major problems and hamper the overall look of the house.
We should not forget that the bathroom is the major wet area of the house. Therefore, it becomes necessary that it is properly waterproofed for avoiding risks of any structural damage which occurs as a result of water leaks, condensation or dampness.
interior waterproofing toronto
Requirements for waterproofing Basement bathrooms
Below mentioned are some of the minimum requirements for the waterproofing in all the residential bathrooms:
- The entire floor of the bathroom that is within the shower excess should be waterproofed
- The walls inside the shower area of a minimum height 150mm should be waterproofed
- In the shower area, the vertical walls between two walls should be waterproofed up to 1800mm high
- A minimum of 100mm over the hob or step down onto the bathroom should be waterproofed
- If the bathroom has a timber flooring/particleboard/plywood, the entire floor of the bathroom should be waterproofed
- If the bathroom is above the ground floor of the house, it should be waterproofed.
Types of waterproofing for bathroom
There are various waterproofing membrane products available nowadays. Some of them come in liquid form that is applied with a roller or brush, while others are rubber sheets that are rolled out and attached to the surface. However, among all, the most popularly used is the liquid membrane, which is very flexible and pretty much easy to install.
Membranes are classified based on CISRO. This classification is based on their ability to stretch before breaking out. Let us go through all of them:
Class 1: These membranes can stretch 65 percent more than the original length. Illustrations include metal, water-based epoxies and fiberglass
Class 2: These membranes can stretch in a range from 65 percent to 200 percent more than the original length. Illustrations include acrylic membranes and bitumen based membranes
Class 3: These membranes stretches aver 200 percent more than the original length. Illustrations include PVC sheet membranes, sheet rubber, solvent-based polyurethane, and water-based polyurethane.
What makes the waterproofing in bathroom necessary?
When water leakage goes undetected for a long time, it can do major damage in the residence. Below mentioned are some of the problems one faces if the waterproofing is not done:
Rise in Damp: This is a result of the situation whenever the water rises through floors, walls, and masonry via capillary action in an opposition to gravity.
Rotting and warping of the timbers: Over here, when the major structural components such as posts, bearers, beams and joists are damaged, it affects the integrity of the entire house
Damaged electrics: When water is dripping onto the light fittings or pooling in the ceilings, it may lead to electrocution and high risk of fire
Plumbing corrosion: When the pipes are rusted, it may cause further water leaks, increasing the problem more
Mildew and mould: The release of spores in the air might cause respiratory problems like asthma
Cracks: When the steel that has been reinforced in the concrete begins to rust, it starts expanding and displacing the concrete around it. This makes the concrete brittle which weakens the foundation of the building.
How waterproof a bathroom is beneficial?
The bathroom is a wet area and each area of the bathroom has its damage repair technique. Let us go through some techniques to waterproof various areas of bathroom:
Preventing mould and damp
A waterproof barrier is installed that helps in preventing the build-up of damp under the tiles and condensation, which can penetrate the plaster, wood and brickwork.
Blocking the leaks
A watertight seal is applied to the areas where the water is getting leaked. These areas might be cracks or gaps in walls and floors. Doing this will save the structural repairs down the track
Offers Insulation
When a house and bathroom is waterproofed, the waterproofed walls helps in keeping the warmth in and reduces the household heating costs in the winter season
Raises the value of property
The property of the home rises when you have a fully tanked bathroom, same like how it detracts when you have a badly waterproofed one which will deter the potential buyers.
What are the reasons behind faulty waterproofing?
Poor water proofing’s main reason is poor workmanship. Besides that, the below mentioned can be the reasons for faulty waterproofing:
Imperfect Preparation
It is must for the surface that needs to be waterproofed to be cleaned and free from any dust and dirt. However, when this surface is not clear, the membrane will not bond properly to it which will eventually peel off
Imperfect application
When waterproofing a surface, it is just that the membrane extends in the area beyond the wet area. Care should be taken that every millimetre is covered and it should be installed to the manufacturer’s recommendations
Poor quality product
At times, cheap quality waterproofing products are used which fails the membrane. Hence, a good quality product should be used to install a proper waterproofing system.
Waterproofing Process
Whenever we decide to renovate the bathroom, it is just that all the surfaces including the joints between walls and floors must be properly cleaned and primed. Also, once the entire task of waterproofing is complete, make sure that the bathroom is not used until it is completely cured. Now, this might take around 4 to 5 days depending on the weather.
Tools essential for waterproofing
Below mentioned are the tools that are used for the waterproofing process:
- A broom/vacuum cleaner/dustpan and brush
- Paint Roller and tray
- Silicone and Silicone Gun
- Masking Tape
- Spirit Level
- Utility Life
- Paint mixer
- Paint scraper
How a bathroom is waterproofed?
Though every company has its style of waterproofing process, the standard process has some basic common steps which are followed by everyone. Let us know these basic steps:
Initial Step
The first step for starting with the waterproofing system is to clean the area with a broom. Care should be taken that the bathroom is cleaned thoroughly and should be free from any dirt, dust or debris. You can make use of a dustpan or a vacuum cleaner.
Second Step
Once the bathroom is cleaned completely, the next step in waterproofing the bathroom is to apply the primer. Thereafter, the primer is transferred to the painter’s roller tray. Now making use of a good roller, this should be applied.
Next is to start with the primer application process from the back of the room. It needs to be rolled uniformly around the bottom half of the wall. When the primer is applied to around 30 cm of the bottom of the wall, the rolling process is continued across the whole bathroom floor.
Third Step
This applied primer is left to get dried. When it is completely dried, the next step is to seal on the gaps with the use of silicone. For this, first, all the old silicone is removed from the areas that need to be sealed. A paint scraper/blade/Stanley knife can be used for removing it.
Thereafter, the gaps are studied to find the nozzle size needed for filling the gaps with silicone sufficiently. Then the nozzle is placed directly at the locations that will be filled. When the exact size is determined, the tip of the nozzle is cut using scissor or the Stanley knife in such a way that it can create the seal sufficiently.
Thereafter, the silicone gun is held at an angle of 45 degrees. The trigger is then squeezed while moving the gun along the line where sealing is done. Both of this should happen simultaneously. This applied silicone is then put to dry for at least 24 hours.
Fourth Step
Once the silicone is dried, the next step is sticking the masking tape across the wall. This masking tape is applied up to the height that needs to be waterproofed. Doing this, a straight edge is obtained which helps in preventing the paint from splashing on to the areas where it is not required.
Fifth Step
Once all the above process is completed thoroughly, the next is to apply the waterproofing product in order to complete this waterproofing task. For an easy and efficient application, the waterproofing product is applied to start from the far back corner of the area. The roller is also used for applying the product. The roller is run around the wall width-ways from where the floor meets the wall. This can be done up to the height of the masking tape that has been stuck to the wall.
Sixth Step
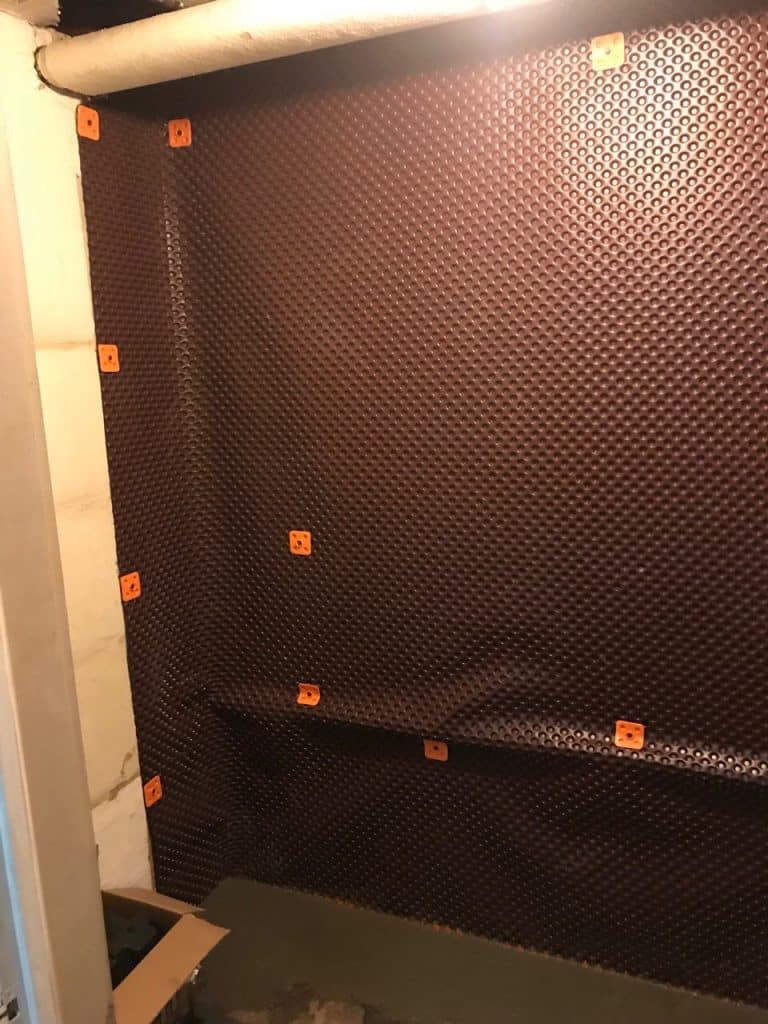
This is the most important step. Over here, the waterproof membrane is applied. The waterproof membrane is considered as the most vital component of a good waterproofing system. Hence, it is must that a high-quality waterproof membrane is used.
The waterproof membrane sheets are cut in a manner that fits the wall and cracks on the floors. Generally, a paintbrush or a paint roller is used to stick the membrane down with the help of waterproofing product. This process needs to be done until it is completely painted over and no gaps are visible. Repetition of this step is done until these requirements are fulfilled.
Last Step
When the membrane has been completely painted over with the waterproofing product and it is ensured that no gaps are left out, it is left for getting dried. When it gets dried, the entire floor is painted.
After a thorough application of the paint, it is left again to get completely dried. Now, this drying process takes about 24 hours to get completely dry.
How much does waterproofing a basement bathroom cost?
This cost differs according to the total job, but in general, it might cost about $30 to $35 per square meter. If we talk about an ideal average-sized bathroom, it might cost somewhere around $500 to $800. This rate might go high for these ones
- A wet room
- Large-sized bathroom
- A second-storey bathroom
However, there are several factors which decide the cost like the type of waterproofing your bathroom might need, the rate that the company is offering you. This is just a common base figure which is subjected to market forces.
There are chances that the cost might go lower if more than one bathroom needs to be waterproofed or if waterproofing needs to be done as a part of complete bathroom renovation.
How long does waterproofing last?
Most of the waterproofing products, if properly applied, provide a 7-year warranty. Also, this depends on the membrane one is choosing. Hence if a good quality waterproofing sheet membrane has been installed, it will last for a long time.
If you ever see anything like swelling skirting boards, mouldy cupboards, ceilings, walls, peeled paint or stained timber, it is a sign of bathroom leak. However, there are temporary solutions available. A Basement bathroom leak can be treated using an over the counter silicone sealer. Using this, it will target only a single area of the bathroom, which will get mouldy quickly.
A permanent solution is required for fixing such issues. The waterproof membrane needs to be replaced by removing the tiles. For this, it is must to buy a good quality membrane and secondly, it should be installed by an expert to ensure its longevity.
Hence, waterproof should be installed correctly and for that, it is suggested that an accredited and trustworthy company or person be used. You can trust Canada Waterproofers for their expert service in this area.